Category: Art

What could be: A Day in the Life of a Children’s Book Illustrator: Turning Imagination into Art

What could be: A Day in the Life of a Children’s Book Illustrator: Turning Imagination into Art

Ever wonder what your life would be like if you had chosen a different career? Recently, I have wondered what my career would look like as a children’s book illustrator. I asked AI what a day in the life would be like. Walk through it with me, and I will show you the differences between my life Graphic Designer/Marketer/Fashion Illustrator versus a Children’s Book Illustrator. My commentary will be in italic for ease of reading.

How My Mornings Begin

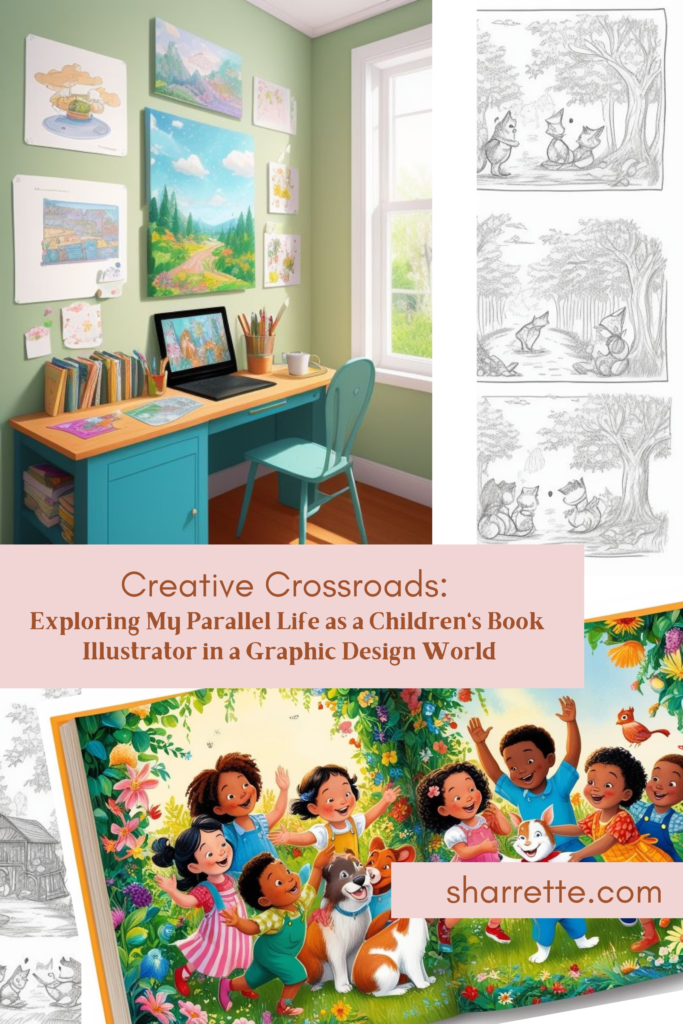
As the soft morning light filters through my Chicago studio windows, I settle into my creative sanctuary, ready to breathe life into another magical story. Being a children’s book illustrator isn’t just a job—it’s a passionate journey of storytelling through visual art.

The first thing that jumps out to me is Chicago? Do I need to live in Chicago to be an illustrator? I wonder how the market is there. I am already in a pretty big market, so I can’t imagine I wouldn’t be able to find a job where I am at. Also, I believe illustrating lends itself well to remote or freelance work. I love the passion that seemingly is there for art. I do cherish that part of my current job, as well.

The Morning Ritual: Sparking Creativity

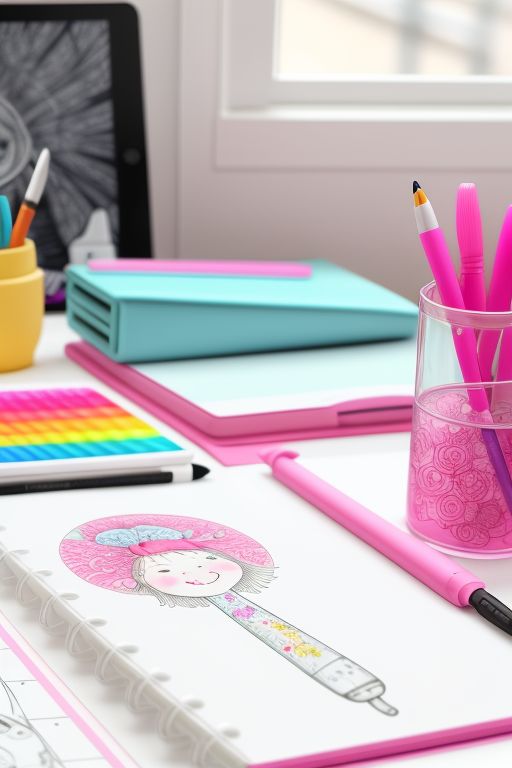
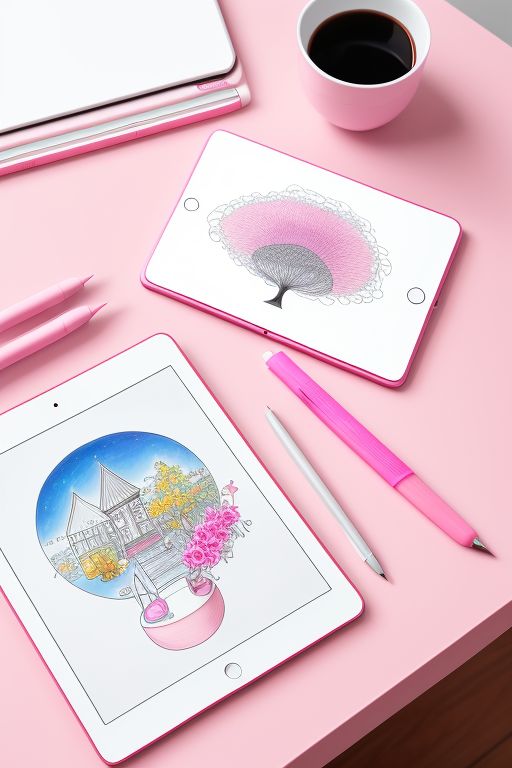
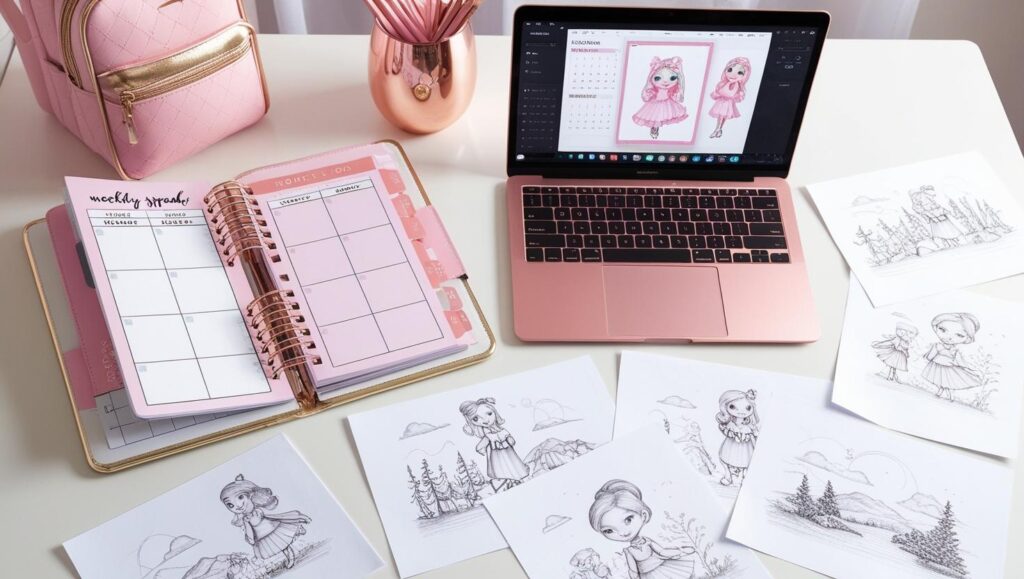
My day begins with a steaming mug of locally roasted coffee and a ritual that’s part preparation, part meditation. I open my trusty iPad Pro, its Apple Pencil waiting like a magic wand ready to transform blank digital pages into vibrant worlds. The gentle hum of my Wacom Intuos tablet in the background reminds me that today, anything is possible.

The first order of business is always communication. Emails from publishers, art directors, and authors flood my inbox, each message a potential gateway to a new adventure. I carefully review manuscript notes, sketch preliminary character concepts, and map out the visual narrative that will soon captivate young readers.

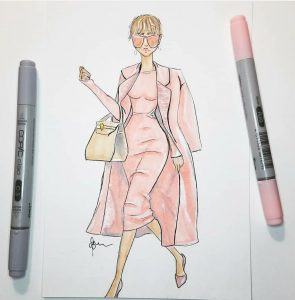
I use an Ipad pro, apple pencil and procreate for my illustrations. It is a very versatile tool that lends itself for whatever art you might create. I have found it to be essential in creating art that is easily revised when working with clients who can have notes on everything. I enjoy working with pencil, paper, and copic markers more but the electronic process for correction is unparalleled.

The Creative Process: From Whispers to Illustrations

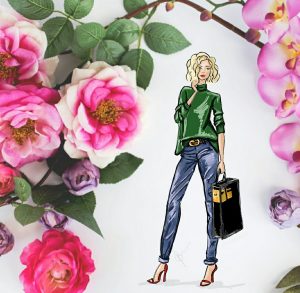
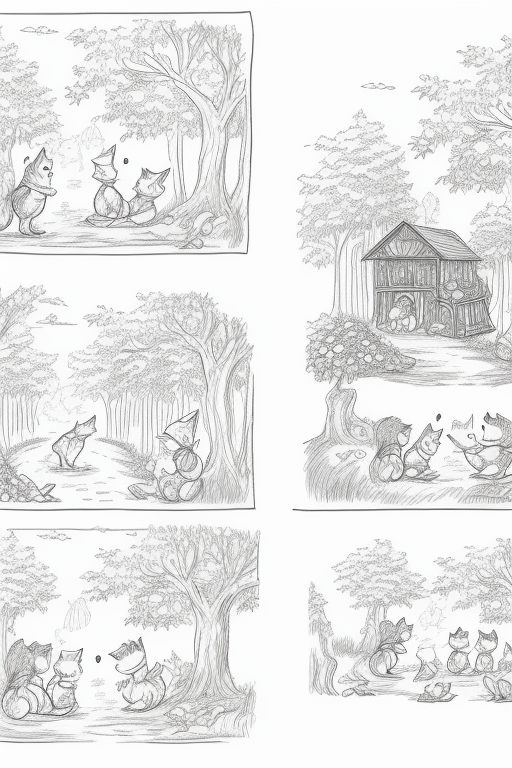
Illustration is more than just drawing—it’s translation. I’m translating words into visual poetry, transforming simple text into entire universes that children will explore with wide-eyed wonder. My Prismacolor Premier colored pencils sit nearby, their rich pigments promising depth and emotion to each character and scene.

Some days, I’m crafting whimsical forest creatures dancing between watercolor trees. Other days, I’m meticulously detailing the expression of a curious child discovering something magical. Each stroke is intentional, each color carefully chosen to evoke emotion and spark imagination.

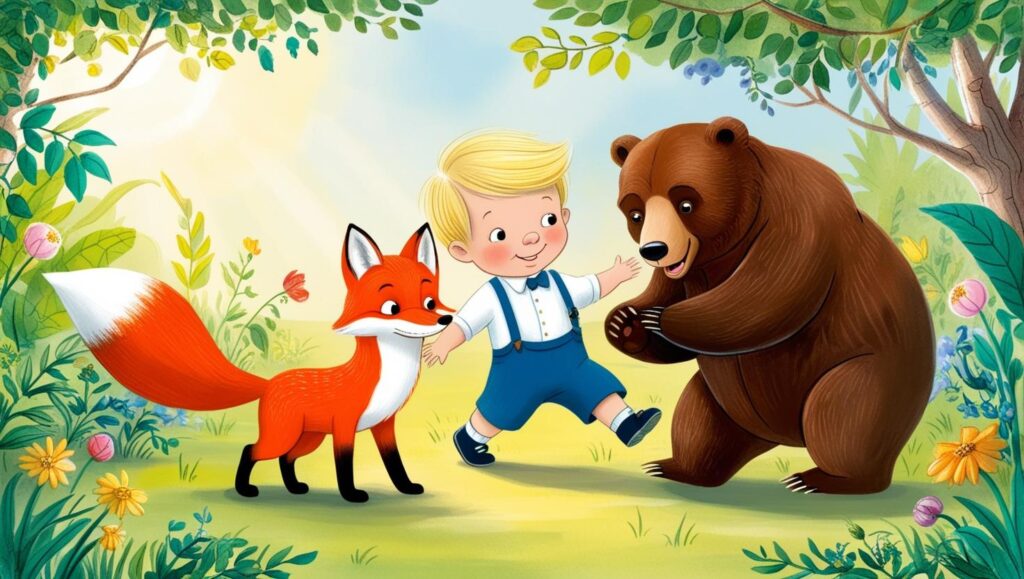
I think this is one of the main reasons I chose Graphic Design over children’s book illustration is these two paragraphs. I am creative but creating worlds out of nothing does not come naturally to me. I do wonder, as with learning fashion illustration, if it is simply a matter of practicing the skill every day. If I were more invested in this, I would attempt to learn imagining and creating worlds out of nothing. I love whimsical illustrations in children’s books.

The Technical Side of Creativity

Digital tools have revolutionized children’s book illustration. My workflow seamlessly blends traditional artistic techniques with cutting-edge technology. Adobe Creative Cloud becomes my digital studio, allowing me to layer, adjust, and perfect every illustration with precision that would have been impossible just a decade ago.

But technology is just a tool. The real magic happens in the intersection of technical skill and pure, unbridled creativity. I spend hours experimenting with techniques, pushing boundaries, and finding unique ways to tell stories visually.

I do not use Adobe Creative Cloud. Before the products became a subscription, I often would use Photoshop, Illustrator, InDesign and more. However, when they created the subscription package, they did not include the major products I used as one option. I would have to do all of them which I find to be too expensive. Because of this, I have found products and services that suit my needs just as well while providing me with more cost effective options. Those being Canva, Procreate, paper and pencil, and other simple editing tools found through-out different apps.

Challenges and Rewards

This career isn’t always glamorous. There are late nights wrestling with a challenging illustration, moments of self-doubt, and the constant pressure to remain innovative. But then a child’s laugh or a parent’s message about how my book connected with their little one makes every challenging moment worthwhile.

This part is true. The late nights working on illustrations, or a custom creation, while doubting your work is difficult. Sometimes pushing through, and seeing what the client says is the only thing to do!

Essential Tools of the Trade

For aspiring illustrators, investing in quality tools is crucial. Beyond my digital setup, I recommend:

  • A comfortable, ergonomic workspace
  • High-quality drawing tablets
  • Professional-grade art supplies
  • Continuous learning resources

You can see the tools and technology I recommend from above. I have found some items need to be professional quality, while others are not as crucial. For example, I definitely recommend the investment of an Ipad pro and Ipad pencil, as well as Bristol paper for alcohol markets. This is important because it protects the marker tips from being split and splayed on rough paper. On the flip side, I have found some alcohol markers that are not Copic brand to be just as good as Copic. It would be trial and error to see what works for you and your needs.

The Business Behind the Art

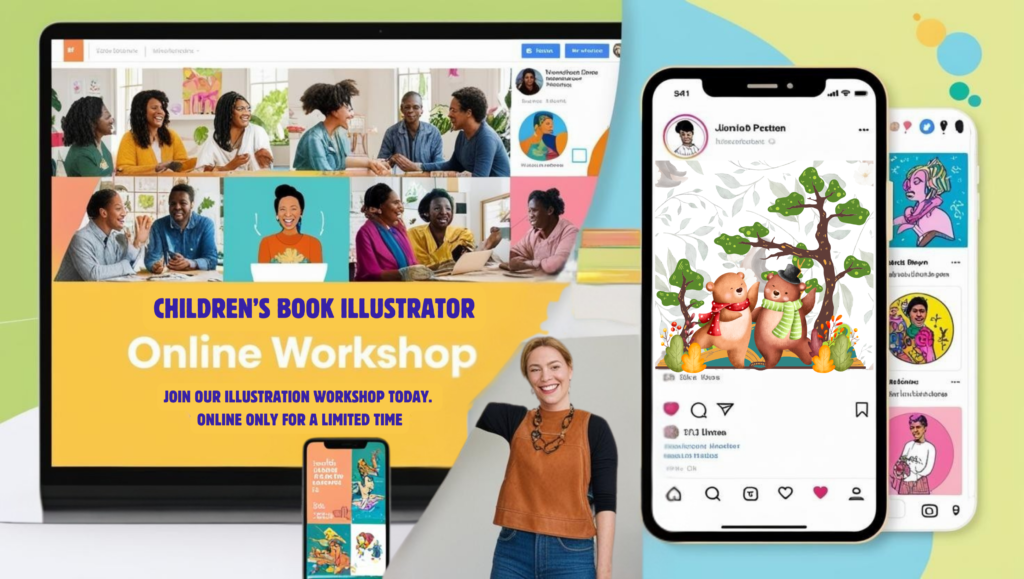
Running a successful illustration career requires more than artistic talent. I’m also an entrepreneur, managing client relationships, tracking projects, and continuously marketing my unique style. Platforms like Skillshare have been invaluable for expanding my skills and connecting with the global illustration community.

Knowing how to market yourself in any career will bring its own rewards.

Conclusion: A Beautiful Journey

Being a children’s book illustrator is a beautiful, complex dance of creativity, technical skill, and storytelling. It’s about creating windows into imaginary worlds, inspiring young minds, and preserving the magic of childhood through art.

Every illustration is a love letter to imagination—and I wouldn’t have my career any other way.

After going through this career path, I realize that there a lot of similarities between the path I am on and what would’ve been. It is a comfort to know that, though, it was an option I am able to do something similar and not really be missing out. What about you? Is there a career you wished you had taken? Have you looked into what it might be like to shadow someone in that field?

One thing I have learned is that you are never too old to reinvent yourself or try something new. So, go out – research and see what you want to do and could do. You really are your only limit!

pinterest pin - exploring a different career path

Free Digital Download

I wanted to share something with you today. A free fashion illustration for your personal use. I hope you like it and enjoy!

You matter. You are essential because no one can fill the place you have in this world. You affect people whether you realize it, with love or hate. So let’s share love, spread kindness, and right wrongs.

Click to download.

Free fashion illustration coloring page

During this stay in, I wanted to share with you some free fashion illustration coloring pages.
If you share on social media, I just ask that you tag me in them or share my website. I would love to see your work!

IG @Sharretteillustrations

Facebook: @sharrette.co

Right click, save image as, and print photo or color on your iPad.

Copyright © Sharrette Co 2020
Purchase of this item does not grant transfer of copyright. I, the artist, retain all copyright privileges. All artwork and images on this site are © Blessing Ball. Images may not be used, downloaded, sold, redistributed, altered, or printed. Personal or commercial use of the artwork without explicit written consent from the artist, Blessing Ball, is strictly prohibited and punishable by U.S. and international copyright laws. Please contact the artist prior to sharing on social media.

More artworks please click https://www.etsy.com/shop/Sharretteco
or visit my blog at www.sharrette.com

Sign Up to My Mailing List and Get a Free Digital Download

I would love to stay in touch with you! That is why I am giving away a free digital download when you sign up for my mailing list.

When you sign up, you will be directed to download this gorgeous free fashion illustration download.

It’s an 8×10, so you will be able to print it out and frame it wherever you like. Sign up now!

Subscribe

* indicates required
xoxo!
The Happy Planner – Creating your Own Planner Pages

The Happy Planner – Creating your Own Planner Pages

I love planners! Last year I started a planner subscription service. After several months, I decided to end that and started blogging instead. The past two years have been such a journey that begun with calligraphy and has expanded into so much more. I have never felt more creative and enjoyed what I do! Plus, I get to stay home with my kids while I do it. All that being said, I like to stay organized. This blog is about My Happy Planner purchase and the expansion pack or add-on pages that I created for it. I’m going to go through some backstory, show you mine, and then talk a little bit about how to create your own planner pages.

Keep reading for more!

The Back Story

As I mentioned in the previous paragraph, I started a subscription service last year and created my own planner packs. It was a great idea and I loved creating the pages for it but it didn’t seem to take off. That is okay because, from that, I expanded to this blog and into several other creative ventures like fashion illustration.

I loved being able to search for different ideas for the planners and then create something beautiful to add to my planner. One thing I found is that I didn’t like any of the covers or cases that I got for my planner. I wanted the planners to be 5×7 and since I was new to the planner world I didn’t realize it wasn’t a typical size. Also, I wasn’t thrilled with the different hole punch options that I saw.

That being said, I created three different types of planners. One I built out a planner and had it printed, two I used a two ring cardboard binder and the third was just a pretty two-ring binder. I still have the three different planners that I created. One of them has been adapted several times with the different things I have needed.

This was like a gateway into the planning world for me. Here are some of the monthly subscription pieces I created:


The look of them definitely improved over the months I created them. As with anything, practice makes progress.

My Current Happy Planner

I went to the store about a month ago and bought a happy planner. I was so excited. My sister got one, and I wanted to get one because I wanted to be able to plan out different activities and school to-dos for my son so that I could stay on track with teaching him things. This is the happy planner I got:

I love the rose gold wording, of course, and it has little rose gold dots through-out the cover. I didn’t get the stickers and pen with mine but this is a great package. I got home and was so excited to open it up and get to planning. I didn’t pay attention, though, when I got it because when I got home and opened it I realized the planning pages don’t start til January.

What to do?

Well, me being my creative self, I decided to make the November and December pages and incorporate my fashion illustrations through-out it.

Here is what I came up with:

I’m in love! If you are like me, you love fashion and fashion illustration. These are three of my fashion illustrations. You can see more of my work on Instagram @sharretteillustration. Or you can check out my shop and purchase fashion illustrations to incorporate into your planner pages.

The format of the December Planning Page overview follows the one that came with my happy planner. I added in a quickshot of birthday previews and answered prayers. I really wanted to focus on thanking God, answered prayers and being thankful so I added that in.

On the weekly planner page, it follows one of the happy planner layouts I saw that I liked. I just adapted the layout to what works best for me in a planner.


With my three planners, I made and already have, I found I used more of the to-dos than the weekly page. So, I put that as the central focus of my weekly planner page with a quick snapshot of what was happening for the day at the top. Finally, the bottom has a scripture that I could write in if I wanted to.

So, after having used this a month now, I’ve found the columns are a little narrow for writing in but I love the layout. The only thing I need to add to this layout would be quarter size insert planner page between weeks or a kid section where I can plan out activities for my boys and their learning/weekly activities. The other side of the week planner page has a prayer list and meal list.

Finally, the month calendar: There isn’t much to say except I love the little fashion illustrations I added into it. On the other half of it, which I dont have shown, I put another prayer list.

What do you think? What would be on your planner pages when you completely customize them?

How to Make Your Own

The Program to Use

Now, I did all of this in Adobe Illustrator. I pasted in the .jpg files of the fashion illustrations then created lines and wording over it. The illustrations have a lower opacity. You can do similar layout in a program like canva so that when you write over it,  you’ll be able to see your writing.

Microsoft Publisher or even in the Canva App are similar apps for you to create your planner pages in. I went to school for Graphic Design so having Illustrator is a must for me, but you don’t need something that expensive.

I have used Canva on several things. It has features I like and features I don’t like. I love that you have a lot of layouts and pre-made things to choose from where you can just insert and go.

One feature that I have trouble with is the auto save feature.  When I have created a design and then go back to make changes, it doesn’t always save all your work. It does save your piece for editing. But there have been times when I have exited and come back and it hadn’t saved everything I did, so I basically had to redo it all.

Canva is a great substitute for Illustrator, though, as you will be able to layout things a lot like you would in Illustrator. You can add images, add text, and even filters or shapes.

Side Note: If you need images without a background, you should try googling .png files. The white background in .png files is inherently transparent.

Steps to Creating, It is Super Simple

So, start with a blank canvas the size that you want to create for your planner pages. For example, my happy planner is 9.25 x 7. So I created the planner pages on that size. Plan out what you want to put on the page, any images what words you want to add and what works best for you.

PicsArt is a great app for letting you create custom canvas sizes then you can move them into what ever other program you are working in.

Add in any text, you can use the shapes tool for writing lines, or boxes as needed or desired. Then add in any images. I, again, recommend using .png for the transparent background. Adjust your image opacity to low so that you will be able to write on top of it while still being able to see the images.

Then you want to think about how you are going to lay it out to print it since it will be double-sided. If you have made multiple pages, you want to lay it out on an 8.5×11 sheet so you can print it from your home printer. You can go one by one and manually print the pages so that you don’t mistake the double-sided feature or lay it out in pdf with moving around the pages.

After you get it to print it, cut it down to size. I use this to cut mine down:

Then punch your holes and place in your happy planner! This is the one I use:


Vola! You have your own personalized planner pages.

If you have any questions, feel free to leave a comment and I will try to help as best I can. I think that hardest part of this is getting it laid out and printed right. I will do a blog post about how to print planner pages with them laid out correctly then add a link here after it is done.

If you have created your own pages before, I would love to hear how you did it and some ways you personalized it. I think the next step for my planning journey is creating stickers with my fashion illustrations. Keep checking back to see when I get them done!

Thanks for reading, xoxo!

How to Add Foil To Your Favorite Prints and Designs

How to Add Foil To Your Favorite Prints and Designs

When I first started calligraphy, a big trend was drawing a beautiful script design and adding foil to it. I was in love! It looked so easy and I loved the finished product. My only problem was the cost involved in getting the equipment to foil things. As I followed people on Instagram and learned more about it, I found that people had some hacks for getting the job done. So, here is how to add foil to your favorite print and design.

The equipment you will need:

The Process

1. Create, design or draw what you want to foil

I do this by using my iPad pro and pencil and drawing a design in the Procreate app. You can create any design you want though. All you need to make sure is that it is in Black and White. The foil will adhere to the image where the black laser ink is printed. I’ve also used apps like Photofy to create text that I want to be foiled.
For example, I can print off a black clip art lip with a white text overlay. After I foil it, the white text will be negative space and the black lips will be where the foil ends up.

Note: If you use more intricate designs than the foil will try to mimic that. Example of that being, if you have a gradient, it will apply more foil to the darker area and less to the lighter area.

2. Print with a laser printer

After I have created the design, I will transfer it to my computer. I do this by emailing it to myself or sending it to myself via text or Google Hangouts. There are a multitude of ways to transfer the file, comment below if you need help with this step.

I then lay it out on a page how I want it to be printed. If it was a simple calligraphy design, I would have drawn it or designed it on an 8.5″x11″ sheet of canvas. But, for something like creating stickers or labels or something I want multiples of, I will lay it out in a program like InDesign.

Side Note: Since I am a graphic designer, I have Adobe Creative Suite and the programs that come with it. Some alternates to Illustrator would be Procreate on the Ipad or even Paper 53 on the iPad. If you need other computer version alternatives here is a list of alternates

After I have it laid out, I will simply click print on my Brother Mono Laser 2320. The mono portion means that my laser printer only prints in black and white. Laser printers can be expensive and so I strictly use my laser printer for things I want to foil. All my other black and white or color pages I want to be printed, I print from my HP inkjet printer.


Funny Story: When I originally went out to purchase the stuff for foiling, I thought I was purchasing a laser printer but ended up buying the HP Inkjet one. I tried to foil something and the foil would not adhere to the ink. Trying to a couple of different solutions, I was at a loss for what to do. So, I contacted the person that I saw using a laminator to see if they could help me figure out what I did wrong. I felt like an idiot for sure when I realized my mistake! So make sure the printer you are getting is a laser printer and uses toner not ink.

3. Lay foil on top of the design

This is the easy and the hard part. On Instagram, a lot of people will cut full page sized sheets of their foil and send it through the laminator. I like to be more efficient than that and only use the size of foil that my image is.

To do this: Measure your wording or image. For me, let’s say I am working on my 2×4 lip stickers, so I’ll need foil about 2″ x 2.5″. I’ll measure and cut the foil down to that size and it creates less waste. Be careful that you don’t cut it too close to your design but give yourself a border around the image. This will help make sure if something shifts you catch the full print with the foil.

Put the shiny part facing up and the other side down on your laser print. That is, put the color you want to see, i.e. the rose gold, facing up and the other side down on your image.


4. Put through a laminator

I don’t use one of those folders for laminators but you can. Depending on the size of your image, print, and foil you can do it a couple different ways. If it is a normal piece of paper, you might want to adhere your foil in place with washi tape so that it doesn’t shift when it is put through the laminator. Or, as I mentioned, use one of those folders to put it into and then put it through the laminator.


5. Peel foil off and enjoy!

After it has gone through the laminator, all you have to do is carefully pull back the foil and reveal the image below. Discard foil and hang around your house or sell the art for everyone to enjoy! These five steps should be super easy to follow for how


to foil your favorite print or design.

Super easy, right?


I hope this tutorial for how to foil your favorite print was helpful and that you run out and get all the supplies today! Overall, you can get started for just under $150. Which, considering the cost for just a Minc Foiler is $100 plus the purchase of a laser printer, you are getting at least 25-50% off. Watch for deals on laser printers and get them when they are on sale, that will help you cut down the startup cost, too!

I’d love to see what you end up foiling and hear your thoughts on this hack. Check out my tips for getting started with fashion illustration here. Comment below or connect with me on Instagram or Facebook.
Xoxo

minc reactive foilersx

My Top Three Favorite Drawing Materials

My Top Three Favorite Drawing Materials

I don’t know what it is about the number three, but I find it alluring and seductive. Not too many things that I’ll get bored reading the blog and not too few that it would be a waste of time. With that said, I’m going to tell you about my top three favorite drawing materials.

Drawing Experience

First, let me give you a little history of my drawing experience. I’ve been drawing since I was like 8. I’ve always loved it. For a while, I would only draw in pencil or black and white. I wasn’t quite sure how to translate the shading I was able to create with black and white into color.

So, all through-out my high school drawing and art classes, my favorite drawing material was pencil and paper. Slowly, I began to expand to colored pencil and marker. I was able to learn and recreate different things into color with correct shading techniques.

My Favorite Art Class

I took several art classes in college, obviously because my major was Graphic Design. 😉 One of my favorite classes that I took was a Charcoal drawing class while I attended Savannah College of Art & Design. The professor really captivated my interest and skill with still life drawings he would set up in class for us to render. They were filled with elaborate detail.

The professor would come by and periodically check our work offering minor suggestions or changes and by the end of the pieces, I felt like I had created a masterpiece. I wish I could remember his name. He had a sketchbook that he would work up different still life drawings in it. I was just awed by how detailed and intricate the designs were.

I also dabbled in gouache and acrylic paint in college.

Anyway, I really didn’t start to expand into different materials until the last two years. I focused for a while on Adobe Illustrator and my career. Since being home and having more time, I’ve learned some Modern Calligraphy and  Fashion Illustration.

Favorite Drawing Material Number One – the Ipad Pro & Pencil

I must begin this with a warning, the iPad Pro and Apple Pencil are addicting. I love doing art in the Procreate app because it is versatile. I can do acrylic, gouache, pencil; the options are endless. Yes, they don’t come out exactly how traditional materials would but they are so similar it is hard not to forgive the minor differences.

Secondly, whenever I do something I don’t like, I can just erase it or undo it. This has been hard for me when I switch back and forth between traditional and digital. It is too easy to undo while using the Ipad Pro that when I draw when pencil and paper, I sometimes catch myself trying to undo what I just did. I would say traditional mediums are more difficult to master because there is no undo. It’s either restart or remake the mistake you made.

Favorite Drawing Material Number Two – Copic Markers

These I just discovered last fall. I feel like I have been missing out though. They are so great for blending. You can create different shades and effects just by layering the markers. Where have they been all my life?!

Even if you were to substitute out Copic Markers for any other alcohol-based ink marker, I bet you would quickly realize why I love these so much! The only con is, of course, the cost. As long as you are using them, I think it is worth the cost. Copic Markers or other alcohol based inks are not worth investing in if you just do art occasionally.

Favorite Drawing Material Number Three – Watercolor


I bet you thought I was going to put pencil and paper down as my third favorite drawing material? Nope, that was then, this is now. I love the light and airy look of watercolor. I also love the way that watercolor blends. It is very similar to how the Copic markers blend, but a little harder to maneuver.

Watercolor is a great medium for either calligraphy, drawing, or fashion sketches. You can get such a different look from using the Copic Markers. Some of my favorite fashion illustrations are watercolor. Check these out:

Practice and Experience

One thing that I want to continue to encourage each of you to do is to practice. Start with one of my three favorite drawing materials, probably the easiest would be the ipad pro, and just create art everyday. If a new material or subject matter is difficult to draw or use, don’t give up. Continue to use it, watch videos on youtube or skillshare. That is the only way that you will learn how to use it and improve.

When I first started calligraphy in November of 2016, it was horrible. I thought it would be super easy because everyone makes it look easy. No, it really is an art form! Participating daily in calligraphy challenges helped me practice and improve. I’m still not the best at it, but I did improve.

The same goes for Fashion Illustrations. It took me awhile to get into the grove and I watched several tutorials on croquis and getting the figure in a style I liked.

Just don’t give up! I haven’t yet, and neither should you. 🙂

Those are my three favorite drawing materials. You can see the similarities between the three. They are all about blending and mixing to recreate just the right shades we see in life and in art. I also, unintentionally, put them in order from easiest to hardest. Go figure!

What are some of your favorite drawing materials? Share with me in the comments so I can check them out and add them to my art supply collection. Did you love this post?

You should check out my post about my Christmas Art Supply Haul, then. I talked about the great art stuff I got and spoiler alert, I mention Copic markers again! Or, follow me on Instagram or Facebook and let’s connect there.


5 Tips You Need to Know When Beginning Fashion Illustration

5 Tips You Need to Know When Beginning Fashion Illustration

Introduction to the Basic Fashion Figure for Fashion Illustration

So you want to get started in Fashion Illustration? It looks pretty simple, you think you can do it, but you don’t know where to start? I’ve been doing this and learning a lot. So let’s discuss the five top tricks that have helped me out and can help get you ahead of the game.

Tip Number 1 – Create Movement with your Fashion Illustrations

You want to make sure your fashion figure pose isn’t stiff but has movement and flow. If you draw your fashion figure straight up and down it will come off as cold and robotic. Here are some of my very first fashion illustrations.

Fashion Illustration

I’m kind of embarrassed to show you these, but everyone has a starting point. This was mine. As you can see, they look stiff and the one on the right-hand side even looks like she is falling over slightly.

Here are some more recent sketches I’ve done with better movement:

So how do you create movement? On to tip number 2.

Tip 2 Study Fashion Magazines & Model Poses

You want to create movement. Angles, the body sways as you walk so you want to emulate that in your fashion sketches. Study fashion photos and see how the models are posing. Here are a few to give you an idea.

Follow the angles the model’s body makes and incorporate that into your drawings. Draw fashion illustrations of models walking the runway. The hips will go one way, while the shoulders go the other. I still have trouble getting this perfect, see my latest Instagram post for what I’m talking about.

Tip Number 3 – Have the Correct Materials

Trio blending copic markers

Having the correct materials can make your work 100 times easier. This one you can get away with not having the correct materials. However, I highly recommend investing in some good alcohol ink markers. The colors blend well when you are using them and create just the right blends you are wanting to create in clothing, hair, skin, etc. You can blend with watercolors and even the iPad pro. But, alcohol markers make it so easy!

Personally, I switch between the iPad pro procreate app and hand-drawn fashion illustrations with Copic markers. I started out with colored pencils and watercolors and started investing in copic markers. It took me six months to invest in them to get a good variety. The difference is huge. Just scroll through my instagram feed and you can see what a difference the materials seems to make.

Copic Markers, or really any alcohol ink markers, are super easy to blend and use. You don’t have to get a degree to use them. You can layer the lighter colors to make a darker shade or add a slightly different tone to create the folds and shades of the outfit. Yes, you can do this with watercolors but I have found that the watercolors were not as easy as a beginner as the copic markers are.

Tip Number 4 – Practicing, Practice, Practice

As with everything, you need to practice, practice, practice to get better. It still takes me several hours to complete a fashion illustration. You can do different practices to help your speed. I just haven’t invested the time in that yet. Since it takes me several hours to complete one, I usually only manage to do about 2 to 3 fashion illustrations a week. I am wanting to be able to do them quicker so I can do more in a week. I am just not there yet.

Still, doing 2 to 3 a week has gotten me a long way from my first to my latest. This is the difference from, my first, 7 months ago to yesterday:


Tip Number 5 – Study Other Peoples’ work

Studying other fashion illustrators’ works and components has been a huge help for me. Check out my post on my favorite fashion illustrators to follow on Instagram. I study different elements or features that they have in their drawings that I love most and try to recreate them in my own figures and fashion illustrations. Occasionally, the artists’ will even posts tips and tricks on what they do to create their illustrations. I always get excited to learn something new to help improve my work!

When I first started drawing fashion illustrations, I had a lot of difficulties drawing the eyes and other facial features. It took practicing and studying what others did to improve. I still have a long way to go. In the beginning, I loved sunglasses or glasses because I just could not draw the eyes to save my life!

Bonus Tip Number 6 – Take an online Fashion Illustration Class

There are a few places that you can take a quick fashion illustration class. Check out skillshare, youtube, or as I mentioned in tip number 5, Instagram stories. You never know what tip or trick will help improve your work the most! Also, don’t forget about pinterest as a huge resource. You can find fashion croquis to help you get started or different outfit ideas for incorporating into your fashion illustrations.

These are my top tips for learning and perfecting fashion illustration. There are so many other tips and tricks you can utilize. I’d love to hear some of your tips that have helped you the most. Comment on this post or get in touch with me via social media! I look forward to interacting and learning with you!